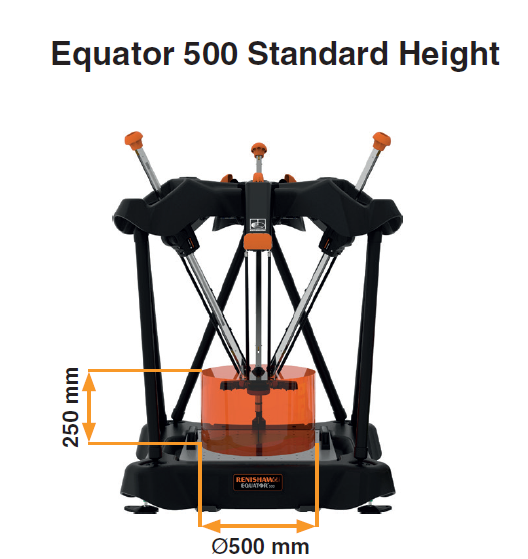
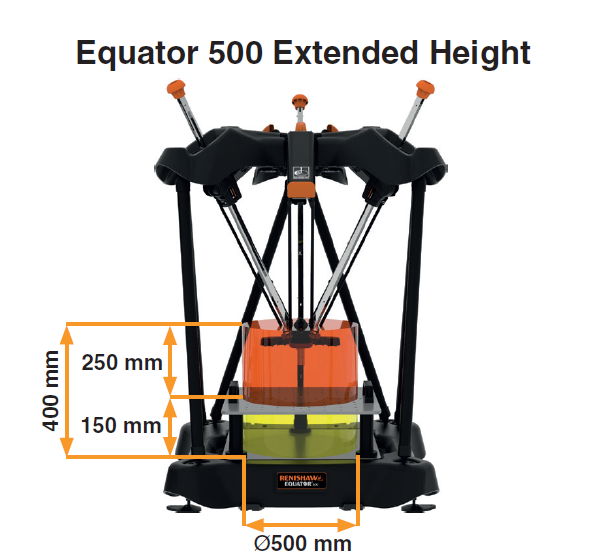
Note 1 The position of the working volume in the Z direction depends on the length of the stylus. The dimensions shown above represent using a SP25 probe and
SM25-2 module with a 75 mm × 8 mm stylus so that the working volume boundary starts at the fixture plate
Note 2 The process of measuring on an Equator gauging system involves defining a series of gauge points on the component surface. Periodic calibration of a
master part on a CMM establishes datum values for each gauge point. The same gauge points on the same master part are measured on the Equator system,
– ‘mastering’ –, to establish a correlation with the certified CMM. Subsequently, a regular ‘re-mastering’ process is used to account for changing environmental
conditions. Size and position measurements made immediately following re-mastering will have a comparison uncertainty of ±0.002 mm relative to the certified
measurements of the master part. This specification applies where each part is fixtured to within 1 mm relative to the master part.
Note 3 Peak consumption at power-up.
Note 4 3-axis system typical consumption based on taking touch points under DCC control + peak consumption at power-up.


