| Model: | - |
|---|---|
| Brand: | - |
| Origin: | - |
| Category: | Industrial Supplies / Machinery / Machine Tool |
| Label: | welding gauges , welding meters , ndt equipment |
| Price: |
-
|
| Min. Order: | 1 pc |
Product Description
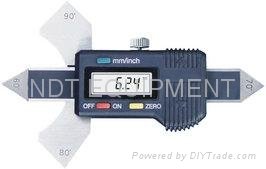
DIGITAL WELDING GAUGE
◆ MAINTAINANCE INSTRUCTION
1. The moving speed should not exceed 1.5 m/s.
2. Being precision measuring instrument, it should be prevented from striking of falling to avoid losing precision when using it.
3. keep the Digital Welding Gauge clean and dry, preventing liquid etc. going into it for affecting normal operation.
4. Places should be cleaned gently with anhydrous alcohol. Never use petrol, acetone and other organic solutions.
5. Never apply any electric pressure on any part of it and never use an electric pen for fear of damaging its chip.
6.Take out the battery and keep it separately from the Digital Welding Gauge if it will stay idle for a long time.
8. Do not disassembling the Digital Welding Gauge.
◆ TECHNICAL SPECIFICATION
1. Zero Setting at any position.
2.Range :0-20mm,0-0.8〞
3.Error: ±0.03mm/±0.001〞
4.Operating Power:One silver oxide battery, SR44, 1.55V
5.WorkingTemperature:0~+40℃
6.Humidity: ≤80°
7.Storage temperature: -10°C~ +60℃
◆ FUNCTIONS
1. Zero Setting at any position.
2. Metric / Inch system switch at any position.
3. The digital welding gauge is equipped with an output port. Data can be input into a computer or a special srinter via special connecting cable.
4.The working way of the interface :Synchronous serialization.
5.Data: Binary code,24 bites .Each datum will be transferred twice . The cycle is 300ms (20ms in fast reading mode).
6.Transmitting time: 0.5ms.
7.Fours wires (from left to right): Negative Power (-), clock Plus CP, Data D, Positive Power (+).
8.Pulse Range of Data: 0 level ≤0.2V ,Level ≥ 1.3V.
9.Clock Pulse CP: 90 KHz, effective for high electrical level.
◆Operation
Press the ON/OFF button to switch on the power. Press the mm/in button to set the unit system you need.
Set zero on a plane to measure plane weld seam according to the picture on the right ; set zero on a 90°bevel to measure 90°bevel weld seam. Then press zero button, the LCD will display〞mm0.00〞.
Put the weld seam between two measuring faces and move the scale till measuring faces and weld seam contract gently, then the value displayed is the height of weld seam.
◆ BATTERY REPLACEMENT
1. Turn to a direction as the arrow indicators in the picture on the right and remove the battery cover.
2. Put in a new battery with its positive side facing out and put on the battery cover.
| Payment Terms: | TT |
|---|---|
Member Information
| North Refractories Co., Ltd. | |
|---|---|
| Country/Region: | Beijing - China |
| Business Nature: | Manufacturer |
| Phone: | 13810560390 |
| Contact: | Rick Sun (Sales Manager) |
| Last Online: | 07 Nov, 2017 |
