| Model: | 5 |
|---|---|
| Brand: | PCsensor |
| Origin: | Made In China |
| Category: | Electronics & Electricity / Electronic Instrument / Thermometers |
| Label: | off-line working , thermograph , out sensor record |
| Price: |
US $42.5
/ pc
|
| Min. Order: | 1 pc |
Product Description
Product Information
|
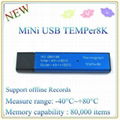
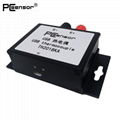
1. Description The thermograph is a miniature stand-alone device that can record temperatures of equipment and environment accurately by using the metal shell. And it can store the data for a long time. You can connect it to computer by the USB port to operate, and it also can use offline. It can use for collect temperature data in transportation and storing of chemical, food, environment researching and so on. 2. Packaging Specification
(Weight of TEMPerB : 60g)
(NOTICE:In order to reduce the volume of goods and reduce the freight, and sometimes we will get rid of plastic packaging products)
Picture 1 Finished product Front
Picture 2 Finished product ( back) 3. Function peculiarity (1) Range of measuring: TEMPerB: -40~+150 Degree Centigrade / -40~+302 Degree Fahrenheit (2) Level of waterproof : IP*7 (3) Battery : Li battery 110mAH, 3.7 V (4)Memory capability : 100,000 items (5)Recording interval : between 1 second to 255 hours (6) Indication of LED signal: When the battery is charging up the green LED flashing; when the device is working ,the red LED flashing; when there is an abnormal state or delay to start work, the blue LED flashing. (7)Battery standby time: between 1 to 5 months (8) Outer power supply: support (9)Life: Record times >100.000, data retention > 40 years, battery rechargeable and re-dischargeable > 500 times. (10)Keep data secret and user management function. 4. Install instruction Software install: a) Install USB driver : put the CD into the computer driver, running the USB driversetup.exe b) Install the framework : running the thermographDotNetFXDotNetFX.exe c) Install the application : running the thermograph setup.exe d) Finished install: running the thermograph.exe on the desktop. When finished install, the system will clue on you to choose the language. Hardware install: Put the thermograph into the USB port of a computer, and do under the clue of the system. If you insert the device correctly, there will be a red and green LED flashing in turn, and the system will emit a right guiding sound. The battery will be recharge automatically after being inserted into the USB port, and the green LED will flash. 5. Operating instruction (Note: Our software only support windows system .) a) Running the thermograph software, and login. The first login password is “aaaa”. Connect the thermograph to the computer, you must sure it is connected success to do the next operation. If the thermograph is connected success, you can see the voltage and electricity of the battery showed on the lower left quarter of the window. See on the picture below. Please note that if you key in a wrong password, the system will mind you “Forget password?” click it will ask whether you want to renew the first login password. If you click “yes”, the system will restore the password to be “aaaa”, but the data which stored in the device will be lost at the same time. In order to protect your device from being damaged by others, you can set “restore password disable” in the setting part. Besides, please check the quantum enough or not before use it to record the temperature.
Picture 3 User Login b) Data setting Click the “setting” part to set a beginning time: i. Start working from the current time: If the starting time you chose (include year, month, date, hour, minute and second) is the current time, then the device will start to record the temperature from the current time and the red LED will flash. ii. Start working from a future time: If the starting time you chose (include year, month, date, hour, minute and second) is a future time, then the device will delay to record temperature, and the blue LED will flash until the starting time you set. The blue LED will flash every 5 seconds during the delay time. iii. The recording interval can be 1s to 255h. iv. When the thermograph is working, the red LED will flash, and the flashing interval can be set between 1s to 255s. v. Abnormal temperature alarm: You can set an upper limit and a lower limit, if the temperature record exceeds these limits, the blue LED will flash. When temperature exceeds the upper limit, the blue LED will rapidly flash 5 times, and when exceed the lower limit, the blue LED will slowly flash 5 times.
Picture 4 preset c) Uploading data Click the “upload” part to upload the data: i. Click the “upload” button, if there is any data stored in the device, it will be send to the PC. When you finish uploading, you can see the data as below: 1.The beginning and over time 2.Recording interval and the total time 3. Total mounts of the record 4.The max, mix and average of the temperature The data can reduce to document and transfer to history curve. The curve also can be reduced to picture.
Picture 5 Upload ii, Look over the history curve: If you want to see the history curve, please click on the “curve” part, then click the button “create curve”. If you want to see the curve of real time temperature, please click “real time”, then the system will read the real time temperature and create a curve of it. And at the same time the record is storing into the system, you can look over in the “real time”.
Picture 6 Curve d) Read the real time temperature: Please click on the “real time” part, then click the button “read” the system will begin to read the real time temperature and store the record. But pay attention that it can create a curve in the meantime; you should set it in the “curve” part.
Picture 7 real time e)Format the memory of the device When the device stored too much data and you think these data is no use or you have already copy them to another document, you can format the memory of the device on the “format” part. Click the button “Erase memory” to start format the device and click “Stop erase” to stop it.
Picture 8 Format the device f) Other function setting The other functions like transfer the measure unit, transfer the language, modify your password, setting the uploading clew sound and so on, you can turn to the “setting” part to set them up. And there are “tool” and “help” part to help you to some other things as to convert the different measure unit, to learn how to operate the system and so on.
Picture 9 Setting 6.Certificate
Note: If you want to download the latest software, please click here:http://pcsensor.com/index.php?_a=document&doc_id=6 |
Product Code: TEMPerB
Member Information
| RDing Tech Limited | |
|---|---|
| Country/Region: | Guang Dong - China |
| Business Nature: | Manufacturer |
| Phone: | 18926595573 |
| Contact: | Alice (sales) |
| Last Online: | 02 May, 2018 |
Related Products of this Company
-
TEMPer8K
US $33.5
-
TEMPer232U
US $25
-
TEMperHUM
US $25.6
-
TEMperNTC
US $29.9
-
USB high temperature thermocouple table
US $18.2


