| Model: | SFG |
|---|---|
| Brand: | Qualtech |
| Origin: | Made In China |
| Category: | Electronics & Electricity / Electronic Instrument / Analysis Instrument |
| Label: | grind gauge , fineness grind gauge , grindometer |
| Price: |
-
|
| Min. Order: | - |
Product Description
 |
Also called grind gages and Hegman gages. Many types of solid materials must be ground or milled into finer particles for dispersion
in appropriate liquid vehicles. The physcal properties of the resulting dispersions, often called "grinds", depend not only on the actual
size of the individual particles, but also on the degree to which they are dispersed.
The Fineness of Grind Gage is used to indicate the fineness of grind or the presence of coarse particles or agglomerates in a dispersion.
It does not determine particle size or particle size distribution.
Grind gages are used in controlling the production, storage, and application of dispersion products produced by milling in the paint, plastic,
pigment, printing ink, paper, ceramic, pharmaceutical, food, and many other industries.
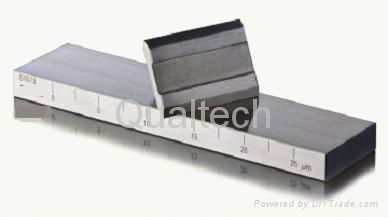
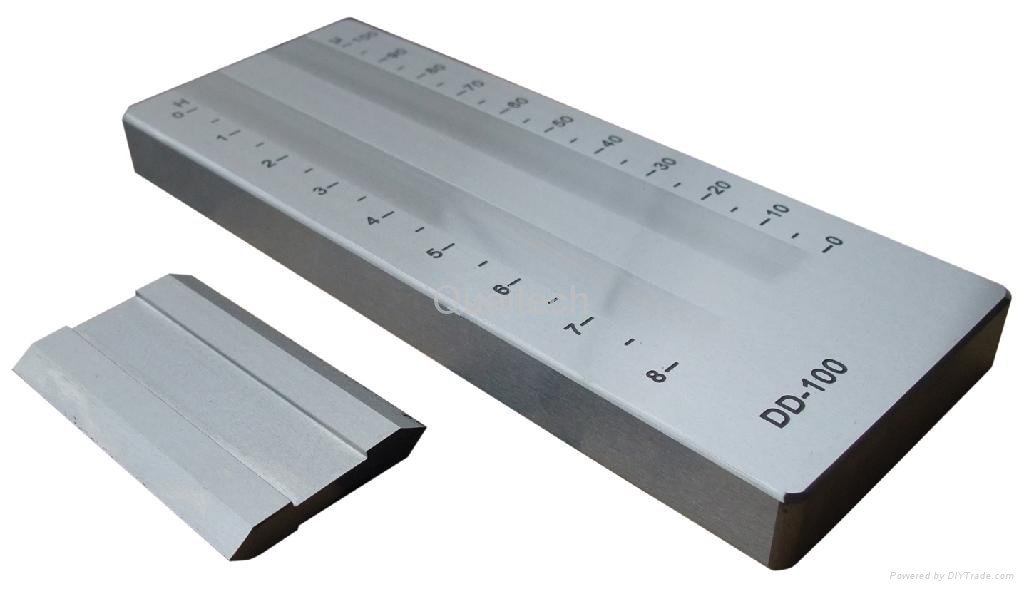
The Fineness of Grind Gage is a flat steel block in the surface of which are two flatbottomed grooves varying uniformly in depth from a maximum
at one end of the block to zero near the other end. Groove depth is graduated on the block according to one or more scales used for measuring particle size.
Most gages will have one scale marked in either mils or microns.
1 mil = 25.4 microns
1 mil = 0.001 inch
1 micron, μm = 0.001 mm or 10-6 m
The Hegman scale or National Standard scale may be abbreviated "NS" on the gage. The scale ranges from 0 to 8 with numbers increasing as the particle size decreases.
0 Hegman = 4 mil/100 micron particle size
4 Hegman = 2 mil/50 micron particle size
8 Hegman = 0 mil/0 micron particle size
0 Hegman =100 microns particle size
4 Hegman =50 microns particle size
8 Hegman =0 microns particle size
The gauge and its scraper are made of hardened stainless steel and have one or two grooves with a graded slope(dependent on the model chosen),graduated in microns, mils, NS (Hegman), the gauges have a tolerance of ±2µm
It confirms the below standards:ISO 1524, ASTM D 3333, ASTM D 1210, ASTM D 1316, DIN EN 21524
Main Technical Parameters
|
Order Information |
Groove Size (L×W) |
Ranges |
Overall dimension |
Graduation |
unit |
Number of Grooves |
|
SFG-1 |
120×12.5mm |
0-25µm |
175×50×12mm |
2.5µm |
µm |
1 |
|
SFG-2 |
0-50µm |
175×50×12mm |
5µm |
µm |
1 |
|
|
SFG-3 |
0-100µm |
175×50×12mm |
10µm |
µm |
1 |
|
|
DFG-1 |
120×12.5mm |
0-25µm |
175×65×12mm |
2.5µm |
µm Hegman (Mils) |
2 |
|
DFG-2 |
0-50µm |
175×65×12mm |
5µm |
2 |
||
|
DFG-3 |
0-100µm |
175×65×12mm |
10µm |
2 |
||
|
WFG-1 |
120×37mm |
0-25µm |
175×65×12mm |
2.5µm |
µm |
1 |
|
WFG-2 |
0-50µm |
175×65×12mm |
5µm |
µm |
1 |
|
|
WFG-3 |
0-100µm |
175×65×12mm |
10µm |
µm |
1 |
Procedure
Place a slight excess of sample in the deep end of the groove, and with the straight-edge scraper provided, draw the sample toward the shallow end of the groove. Ratings are in term of the point on the
scale where the oversize particles, or furrows made by them, first appear in substantial concentration
Member Information
| Qualtech Products Industry Co.,Ltd | |
|---|---|
| Country/Region: | Shang Hai - China |
| Business Nature: | Manufacturer |
| Phone: | 13798026588 |
| Contact: | Lucy Lee (Sales Manager) |
| Last Online: | 16 Jan, 2015 |


