| Model: | - |
|---|---|
| Brand: | Ever-power |
| Origin: | Made In China |
| Category: | Industrial Supplies / Farm Machines Tools |
| Label: | pto shaft , pto drive shaft , tractor pto shaft |
| Price: |
-
|
| Min. Order: | - |
| Last Online:16 Mar, 2023 |
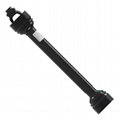
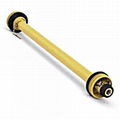
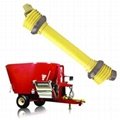
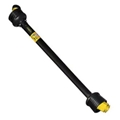
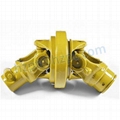
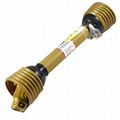
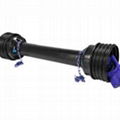
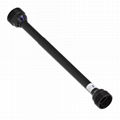
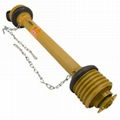
A PTO shaft is a device that transfers power of your tractor into attachments powered by a PTO connected attachment. This allows the tractor to provide power to a variety of tractor-powered equipment, including flail mowers, chippers for wood excavators, rotary tillers and many more.
Specifications for W 2400 Series PTO Shaft
150-250cm Cross-to-Cross Length
The length range is 165 to 260cm overall.
W2400 Series.
32mm x 76mm x 86mm (approx.) triangular Profile drive tube.
39KW-53HP @ 540 rpm,
61KW-83HP @ 1000 rpm.
Standard Shaft Includes:
1 3/8" 6 Splines Free Yokes At One End.
No End Yoke on the Other Side.
Security Guard.
I'll take an unstandard yoke.
| Weight W, Weight | kg | 15.1 |
|---|---|---|
| Inner diameter, d | mm | 32 |
| Outside diameter D | mm | 170 |
| Splines number F | 21 | |
| Length L | mm | 610 |
| Inner diameter, d1 | mm | 35 |
| Slots, number of slots and F | 21 | |
| Length 2 Length 2 | mm | 860 |
W 2400 Series PTO Shaft Applications
Parts for spares to support the combined driving force consisting of Massey Ferguson, Claas, and Gleaner.
Series W 2400 PTO shaft is designed to fit these machines for agriculture:
Combine harvester Challenger: 660 670
Combine harvester Claas: LEXION
Combine harvester Gleaner: C62 R40-R75
Combine harvester Massey Ferguson: 8780 9690 9790
Tractor Massey Ferguson: 8680
Make sure that the drive torque is transferred to the drive components of the machine to replace damaged or worn components during restoration and repair work.
An assembly consisting from a beam central to the beam as well as two forks that pivotally connect to the beam's ends. This connects the shafts to allow torque to be transferred between shafts having significant shaft displacements (up 40-45deg) which change with their rotation.
PTO Shaft Parts and Components
The HZPT's PTO shafts and parts can keep your equipment running. As a major manufacturer of PTO shafts, we have an extensive range of standard, constant velocity and metric drivetrains and PTO shaft components and components (implement PTO shaft yokes, PTO shaft clutch as well as PTO shaft tubing). HZPT offers a variety of tractor PTO shaft drivetrains. We provide drop-in drivetrains and other components for replacement which offer an easy solution to customize or repair your application.
| Tractor Yoke | and Bearing Kit & Bearing Kit | Shaft | Shaft Weld Yoke |
| Slip Sleeve | Tube | Tube The Weld Yoke | implement Yoke |
| Yoke & Shaft Assembly | Yoke & Tube Assembly | Drivelines | Guard & Guard Bearing |
PTO Drive Shaft Types
There are two kinds of PTO shafts. Everyone who owns a tractor has to be aware of the PTO shaft type that is on their tractor. Some people don't realize the necessity of identifying the PTO shaft until one has to replace an worn-out PTO shaft. Let's discuss both PTO shaft types, and then show how easy it is to identify the different types of shafts. One PTO shaft is referred to as the domestic type, while the second is called the one that is metric.
It is possible to identify the various types of shafts by their shape. The common PTO shaft comes in four forms: square, round, rectangle and splined. The Metric PTO shaft comes in three shapes: bell, star and football.
Domestic PTO shafts are popular throughout North America, so the design of the shaft is typically attributable to North America. This is because the Metric PTO shafts that have balls and stars are believed to be from Germany. It is believed that the Metric PTO shaft that has an oblong shape is thought to be attributed to Italy. Each PTO shaft design (shape) includes a variety of types, that differ by PTO shaft size and dimension. Once the type of shaft is identified it is possible to measure the end of its cap from another at the U-joint as well as the outer diameter of the cap's bearing to identify the series of the shaft.
How do I Attach the PTO shaft to Tractor?
PTO shaft injuries are one of the most frequently occurring and devastating cause of injuries resulting from tractor accidents. Before operating the tractor and installing PTO shaft parts, make sure you read and follow all safety instructions and the best practice contained in operator's manuals of the tractor and the implement. Make sure that all shielding and other components of the tractor and PTO shaft elements are properly working state. Avoid working with the tractor and the implement PTO shaft components when the tractor engine is in operation or when any part that is part of the PTO shaft-powered equipment is in motion.
In order to connect the drive shaft of an implement's PTO to the rear PTO shaft of the tractor it is necessary to turn over while lifting the equipment's PTO shaft that is heavy. In addition, you need to place the PTO driveline splines as you pull back the implement's PTO shaft's release collar, or pressing the pin-lock release while slidgin' the shaft of the implement on the tractor's PTO shaft. It doesn't seem easy.
To make this difficult job easier, follow these tips from experts in tractor operation. (Wearing gloves when performing PTO shaft connection is a clever tip to keep from scrapes and cuts.)
The first step is to ensure that all the necessary settings are in place to allow an PTO shaft to occur (reading the tractor's and operations manuals is essential to knowing the correct settings for each machine). Many tractors let you set your PTO shaft onto the tractor in the neutral position. This will ensure that the tractor's PTO output shaft can spin freely, making the alignment of the shafts' splines a lot simpler.
If you're connecting an implement with a 3-point mount be sure to ensure that your 3-point hitch remains in fully down position so that it is not being crushed accidentally when someone is able to turn the lever accidentally. The implement and the hitch can be reduced even if the engine is off. If you are unable to make your PTO shafts in alignment with the 3 point implement in fully-down position, you may have to take the drawbar off. In most cases, removing the drawbar is an ideal option for PTO shaft-powered 3-point tools. This will prevent damage to the PTO shaft from the shaft hitting the drawbar once the implement falls to the limit of lower travel that the 3 point hitch can reach. Verify the space between the PTO shaft as well as the drawbar prior to when you begin to use an PTO 3-point implement powered by a shaft.
In the event that your tractor's PTO shaft is not equipped with an unlocked setting, and the PTO shaft of your tractor is locked even when the engine is shut off. In this case it is possible to connect your implement on 3 points, lift it, then lock it to the extended position prior to closing the tractor this wayyou'll be able rotate the shaft of the implement to make sure the splines are properly aligned. Be extra careful to keep fingers from the PTO shaft's universal joint because there could be some energy behind the shaft's movement.
The next step is to ensure that your two PTO shaft ends must be in good condition. Splined shafts that are dirty and dry are nearly impossible to connect. Splined PTO shafts are made to be a snug fit. A tiny bit of soil grit or a few crop residues can prevent them from sliding.
Then, lightly coat them with grease so that the two pieces of steel slide into each other. Clean oil that comes from an uncontaminated source is recommended but experienced tractor operators are able to play around on the spot. Once the oil is lubricated both shafts will slide faster.
This PTO shaft connect is too far from the ground on compact tractor and their equipment. It is possible to sit down to make your PTO shaft's connections. While kneeling, carrying the load of an PTO shaft is easier in the event that you're sitting on a level surface. A car floor mat or a carpet or cardboard will reduce the stress on your knees as you are connecting your PTO shaft.
When the splines have been aligned when they are aligned, press the locking pin or pull it back from the collar of the ball lock and press the shaft into the PTO shaft. If it's not able to slide, moving the end of the PTO shaft upwards and downwards will assist in getting it going.
When you're ready, slide the shaft in a circular motion. You might hear a click and the button should be able to retract back to its initial position, or your collar should slide forward. To make sure that the lock on the shaft is properly settled, pull back the shaft by pulling your hands away from the button or collar; it should be difficult to pull off.
By following these easy guidelines, you can create PTO shaft hookups more efficient and faster in getting what you need done.
How do you cut an PTO shaft in the proper Length?
Could cause damage to chipper bearings as well as tractor PTO. When it is found that the PTO shaft has too much length, it can get stuck as the 3-point hitch gets raised. In the event that it is found that the PTO shaft's length is excessive, the PTO needs to be removed. Equally, it must be cut short to reduce the two parts of the PTO.
1. Install the chipper onto the three-point hitch on the tractor.
2. Remove the engine and take out the key. Set the chipper on a level and firm surface.
3. The three-point hitch should be lifted up so that the power intake shaft of the chipper is at the same height that the PTO of your tractor. The power take-off as well as the air intake shafts should be the closest to the location.
4. Remove the PTO shaft off. Attach the shaft in half to the chipper, so that the locking pin is locked into the correct position. The other end of the chipper with the end that is connected to the PTO for the tractor. The sides of the End in a row, as shown in the picture towards the left. Mark your shield how much has to be removed. The tubes should be cut to a length that they can't get to the bottom from every chipping position.
5. Cut the tube of plastic.  6. Cut a section of the profile tube. It should be the same size as the one that was cut off from the shield. Reduce the other end of the PTO shaft to be the same length.
7. Remove sharp edges from the tubes that are profiled. You'll need to take any burrs on the edges of the PTO shaft to enable the PTO to slide smoothly. It is recommended to apply grease on each side of the PTO prior to rebuilding. After you've reassembled the PTO shaft, it is ready to be joined to the tractor and then installed.
PTO Shaft Accident Issues
Because of PTO shafts that are used to drive agricultural machinery that are subjected to extreme stress and loads while operating, the possibility of failure is high. Being aware of the location where the problem is occurring will allow you to determine the source of the issue.
Compression Problems
Continuous pressure on the PTO shaft over a prolonged period of time may cause damaged connections to the PTO shaft as well as the connecting shafts, tractor, implement, or bearings. All of these issues can be addressed by shortening the PTO shaft's length. Contact the skilled professionals at HZPT to accomplish this task properly and swiftly to get back on track to complete your work quickly.
Wear and tear
While operating agricultural machinery is inevitable to experience wear and wear and. The areas to be aware of these, particularly, are the yoke ears and sides that may be damaged due to working at angles. If the gradient is greater than 45 degrees and the PTO shaft should be removed.
Sections and tubing that are telescoping may also be subject to excessive wear if lubrication insufficient where the tubes meet. Lack of lubrication may also result in excessive wear on the shield bearings. In the absence of proper lubrication friction between the bearings is too high. They must be lubricated at least every 8 hours.
Broken or damaged Parts
It's when things begin to go slower, or when you concentrate on a particular part of the machine that usually is running smooth. Parts can be damaged in any of the telescope tubes, cross-bearing arms , joints or yokes. Be aware of the load on your equipment and make sure that you're using the correct PTO shaft for the task you're trying to complete. Heavy-duty equipment will endure a great deal of stress however it is essential to take a break if something doesn't seem working properly before it becomes more damaged than the scope of a repair.
Problems with Clutch
The majority of tractor PTO shaft problems and failures result from an incorrectly adjusted clutch or an inability to adjust it. If you intend to turn your farm's land or perform work that requires continuous contact, you should be certain to use the slip clutch to take the impact.
PTO Shaft Maintenance
PTO Shaft for Agricultural Gearboxes
Agricultural gearbox as well as PTO shafts are the two tractor parts which work in tandem to transfer power. Yokes join to the agriculture gearbox and the PTO shaft on both ends. The PTO shaft is rotated at 540 up to 1000 rpm. According to the use the shaft may be more or less torque rating. We supply a wide range of PTO shafts for professional agricultural machinery parts supplier. Contact us now for more details!
Agricultural PTO S aft Manufacturers
1. Professionally designed and manufactured sales and manufacture of agricultural equipment for more than 20 years.
2. "ever-power" and "HZPT" is manufactured in China.
3. Certfication
4. A strict quality control system along with pr vide. finest vice is available to customers.
5. We offer high-quality products and quick after-sales service.
6. Our goal: win-win.
7. We are able to design and create lots of new products according to the requirements of cus omers.
8. We've developed a number in replacement components for J panese tractor We can also deliver parts along with the tractor.
| Payment Terms: | TT/LC/DP/DA |
|---|---|
